Monday, October 15, 2012

DIY Cleaning Wipes

There was a point in time when I spent a small fortune on cleaning wipes. You have to admit they make life so much easier but boy are they expensive! Shortly after having our second son and was exposed to the fabulousness of reusable diapers. Then one day it hit me. Why couldn't I do the same for my cleaning wipes? It really isn't hard to make these. The hardest part is cutting up the towel to make the little wipes.
 
The fist thing I did is measure the size of my container I would be leaving my wipes in and I cut my wipes to fold once and fit in my container.

 
Here are the ingredients for the wipes. Pine Sol, water, a measuring cup a plastic sealable container (purchased at Target) and the towels for the wipes. This recipe is best for killing germs and such. There are other recipes that use vinegar but I noticed they turn sour fairly quickly. 
For this project  I happened to have a package of small working towels from the auto parts store but you can use whatever suits your fancy. Even a cut up old t-shirt will work.  
 
DIY Cleaning wipes recipe:
2 1/2 Cups of water
1/2 Cup of Pine Sol
 
First you will want to fold and put your towels in the container. Then pour the water over the towels.


Immediately after pour the Pine Sol. 

 
Then seal the container. Let all of the fluid sink to the bottom and then flip it upside down.


You will probably want to wait about a half hour to make sure all the liquid has been absorbed by the towels. Then you can clean to your hearts content. Well at least until you need to make them again! Once they have been used I just put them in the laundry with the rest of our towels to wash.

Happy DIYing!
Jen

Thursday, October 11, 2012

DIY Bisquick Mix

I love Bisquick but I haven't been very fond of all the ingredients they use to make it. So I looked on the Internet and found that its totally possible to recreate the mix. But please note that this version needs to be put in the freezer as it does not have the preservatives in it that make it shelf stable.
 
Here are the ingredients.
Butter, Flower, Salt, & Baking power
 
You can use Bisquick mix to make so many things. Waffles, Pancakes, biscuits, and cookies. I could go on and on but I'll spare you.
Recipe:
3 Cups - Flower
1.5 Tsp - Baking Powder
.5 Tsp - Salt
1/4Cup - Butter
 
This can totally be made by hand with a pastry cutter but it takes much longer and I'm lazy! So with the food processor method you want to cut up your cold butter into small chunks add your other ingredients and place them in the blender. I usually blend it on the blend setting for approximately 2 minutes.

 
Once your done blending it should look something like this.
The butter should be completely processed in at the end of two minutes. I like to fill a large pitcher full of the mix. That way it has a handle to carry it around with. It and it usually takes 4 batches to fill the pitcher completely full.  As you can see I keep the recipes I use the most on the side of my pitcher and of course the original recipe to make the mix.
 
Happy DIYing!
Jen
 

Saturday, September 15, 2012

Birthday breakfast in bed.

I just received my first birthday present of the day. Breakfast in bed from my favorite Kindergartener ( I'm sure he had some help from dad). What was your favorite birthday experience?

Wednesday, September 12, 2012

Modge-Podge Birthday Letters


We are full speed ahead planning for Xavier's 5th birthday bash at the end of this month. Here is project one of at least 20: Modge-Podge Letters. 

For the letters I made my own modge-podge because, lets face it, times are toughand I'm cheap. It worked like a charm and easy as pie to make. Half cheap-o Dollar Tree white glue the other half water.

What you willneed:
Modge-podge
small foam brush
cardboard letters (I got mine from Joann's)
material you willglue onto your letter

So the first stepis to cut out what you are going to modge-podge to your letter. I cut outimages from comic books I purchased from the second hand store.

Next place a niceamount of glue onto the surface of your letter and position your paper onto theletter. 

Place the cut paper onto your letter with glue on it. Then apply a thin layer of modge-podge on top of your paper. You want to make sure your paper is saturated with the solution enough that it is 'wet' but not so much that there are beads of clue laying on top. 

Now wait for it to dry. 

I applied the paper only to the front of the letter and painted the sides and back. But you may want to modge-podge the sides. Don't hesitate to get creative!

Till next time!
Jen

The Super Party Begins!

Our oldest son's birthday is in September and usually by this time the majority of the work is done. This year as many of you probably already know I started a new job. So every waking second not spent on my family I either spend out in the garden or working.

Xavier requested a superhero birthday party this year. We finally  finished the invites and sent them out this week. My fabulous husband did an awesome job putting them together. And we saved so much money doing them ourselves. Here is the front the back is done box style in the comic theme.


 How do you like to put together your children's birthday invitations. Do you prefer buying them or making them yourself?

More party planning to come stay tuned!

Saturday, August 11, 2012

Logan's Pirate Party


This has taken me FOREVER to actually post. Logan's birthday was actually back in February but after all this superhero party planning I had to get them up. So here is the infamous Pirate party.


We made an x to mark the spot instead if the traditional balloons and if course a pirate flag flew over the house.


The kids were greeted by a live pirate who helped them get pirate ready with a bandana, hat, sword, spyglass and tattoo (temporary of course).


Of course no pirate is can be without his ship. I got lucky and our regular bouncy house company we use had the ship available.

We had boat dogs and grog and a treasure chest cake made from scratch.  


The kids had a blast and we played pirate music. The ended the party with a treat bag filled with rock candy and chocolate cannon balls.


Till next time,
Jen

Friday, August 10, 2012

DIY Oatmeal Packet Tutorial

Sorry for the wait. As promised here is the Oatmeal Packet tutorial. I used a sewing machine for this. I know it sounds strange but .... IT WORKS!

You will need:
Sewing Machine
Lunch size paper bags (I used the larger sized bags)
Thread

1. Take your flat paper bag and fold the bottom in half. Stitch up the end right above the bottom. I sat and did this two all 8 bags I used for making oatmeal with.

2. Sew another seam all the way across 5 inches above the last seam.

3. cut all the way across directly below the second seam sewn.

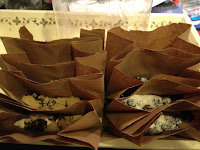
4. Now you will want to lay all of your packets out and dispense your ingredients for your oatmeal packets. You can find my recipes here.

5. After you have all the bags filled you can stitch up the other end. Make sure to push all of the oatmeal to the end of the bag that is already sewn.

6. Now you can decorate the front. Make sure you don't push through the bag! I used some crayons to decorate ours!

Enjoy,
Jen